QUALCOMM TOOL (QFIL)
STEP 1:
First, we need to install adb on our computers, and for that, we will use a program called “adb setup“, thanks to Snoop05 from XDA-Developers, this will enable adb and fastboot commands to work on our systems. It will also install necessary adb drivers. There are many ways to do that but what is more important about Snoop05’s solution is that we can use adb and fastboot commands system-wide, this means our old “command prompt” will turn to accept this commands, and no need to work in the “adb” folder like we used to before. Then install Qualcomm Diag port drivers on your system.STEP 2:
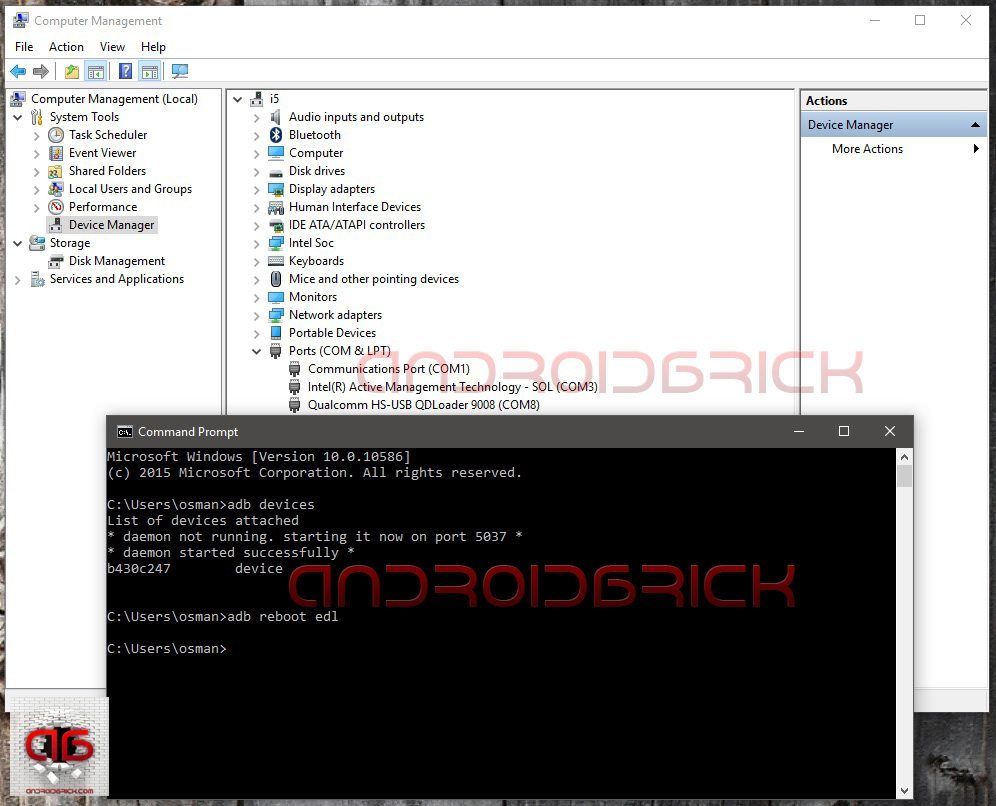
On Lenovo phones to enable USB debugging, click “USB debugging (ADB)” under “USB computer connection” from the pop-up window when you plug the USB cable. On ZUK Z1, if Cyanogen Rom is installed, go to settings> about phone, and click “Build number” couple of times till you see “you are a developer“ message. Then back to settings>Developer opitons>USB debugging, click it and allow. Your system will install necessary”adb” drivers. Now open command prompt and type :“adb devices“
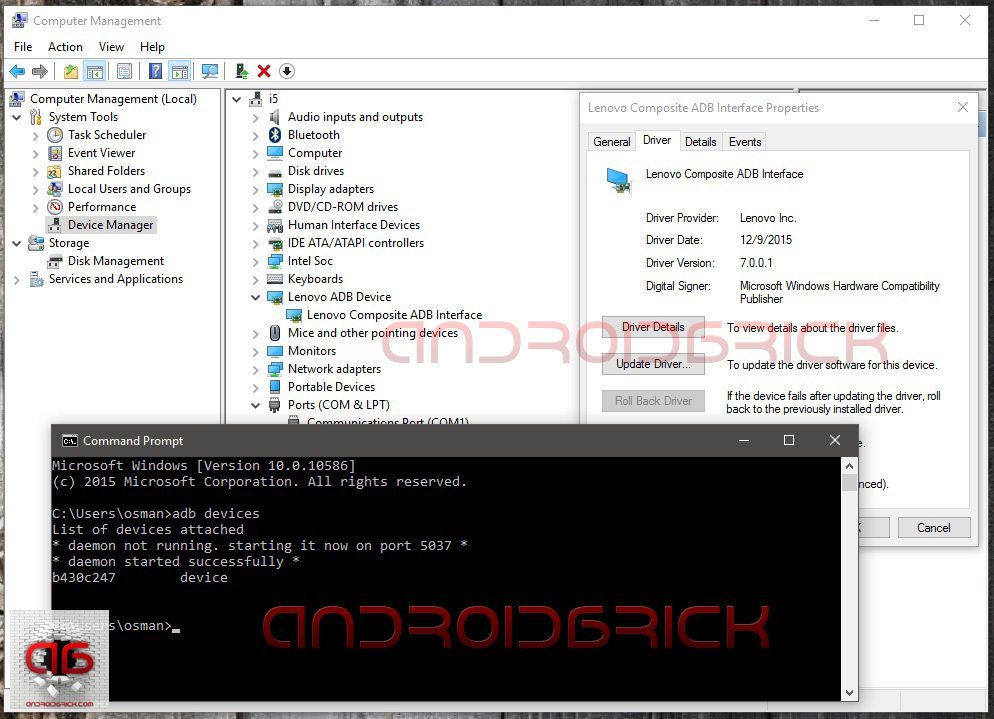
Look at your phone for the “Allow USB debugging?“ message, select “Always allow from this computer“ and click OK. If you forget to allow from phone, the command will return “unauthorized“, if OK you will see your phone as “device“ .
STEP 3:
Install QPST build 430 on your PCs. After setup finishes go to “C:\Program Files (x86)\Qualcomm\QPST\bin” folder and locate QFIL.exe, create a shortcut on your desktop, or continue to work from bin folder, as you like.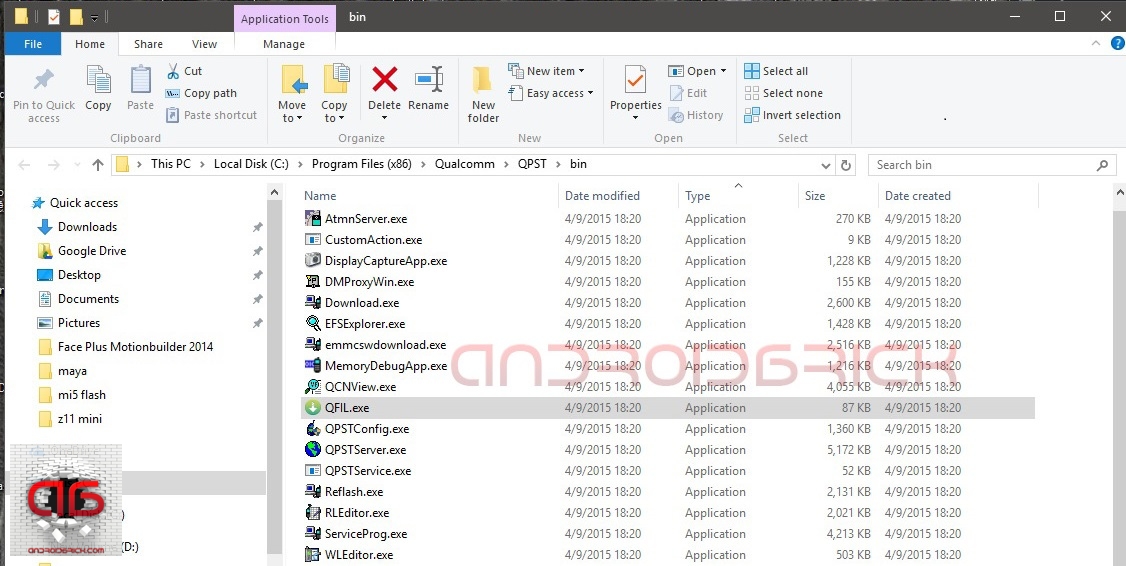
STEP 4:

After you downloaded your ROM and unzipped it, run “QFIL.exe”. Select “Flat Build” option under “Select Build Type”, then click “Browse” under “Select Programmer” and locate the mbn file that is starting with “prog_emmc_firehose”. In my example its “prog_emmc_firehose_8936.mbn”, 8936 is the code number for Qualcomm Snapdragon 615 chipset, for ZUK Z1 it will be “prog_emmc_firehose_8974.mbn”, 8974 is the code for Snapdragon 801 series.
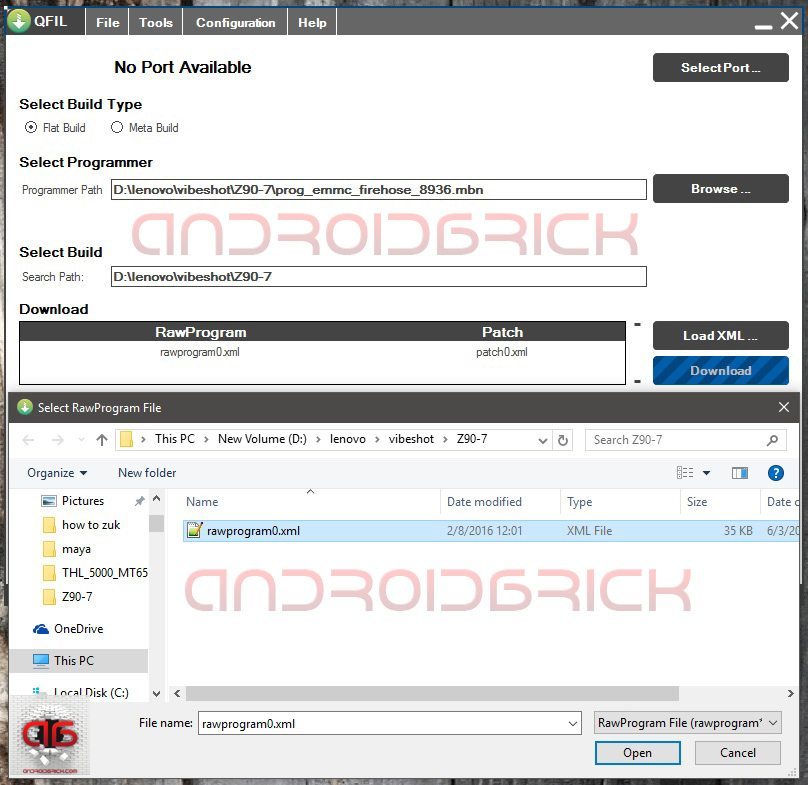
Then, under “Download” click “Load XML” tab at the right end of the window, the pop-up window will locate the rawprogram0.xml that we need. After you select it and click “Open” another pop-up window will come automatically and show you “patch0.xml” to select .
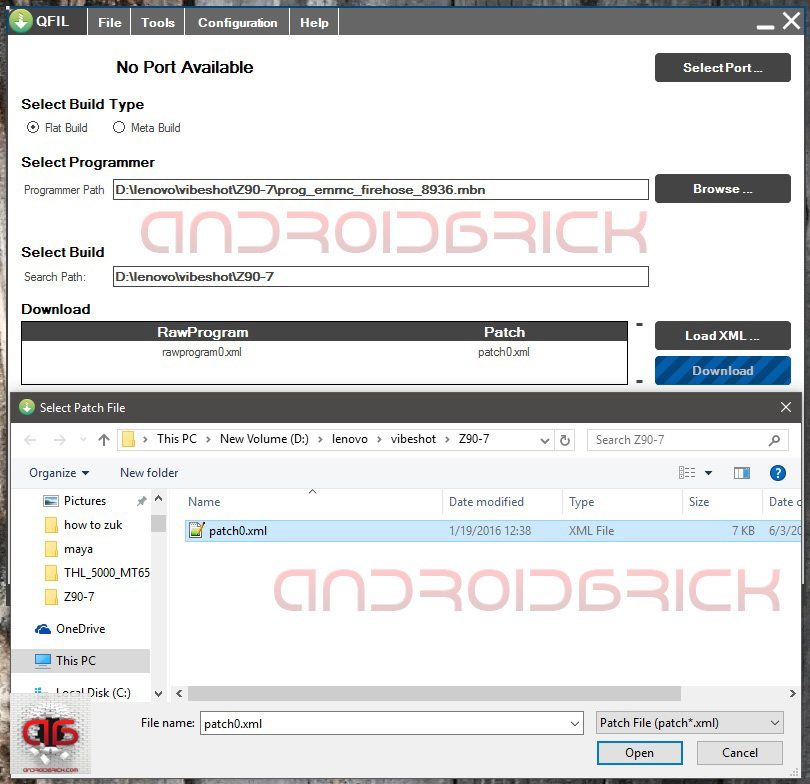
After necessary files are selected, the Qfil configuration should look like this :
STEP 5:
Now it’s time to open our so called Qualcomm HS-USB Qdloader 9008 service port to work with. If your phone is in working condition, we will use an adb command from command prompt :“adb reboot edl”
If your phone is bricked / can’t boot up / stuck at logo / restarting itself continuously, then we will use the key combination to open our Qualcomm HS-USB Qdloader 9008 service port. That key combination depends on the ROM that you had on your phone before it’s bricked.
If you were on Lollipop : Phone must be completely off. Pressing “Volume Up” key plug the USB cable in WITHOUT PRESSING POWER BUTTON ! Port will open.
If you were on Marshmallow : Phone must be completely off. Plug the USB cable in and immediately press Power On button. Port will open.
STEP 6:

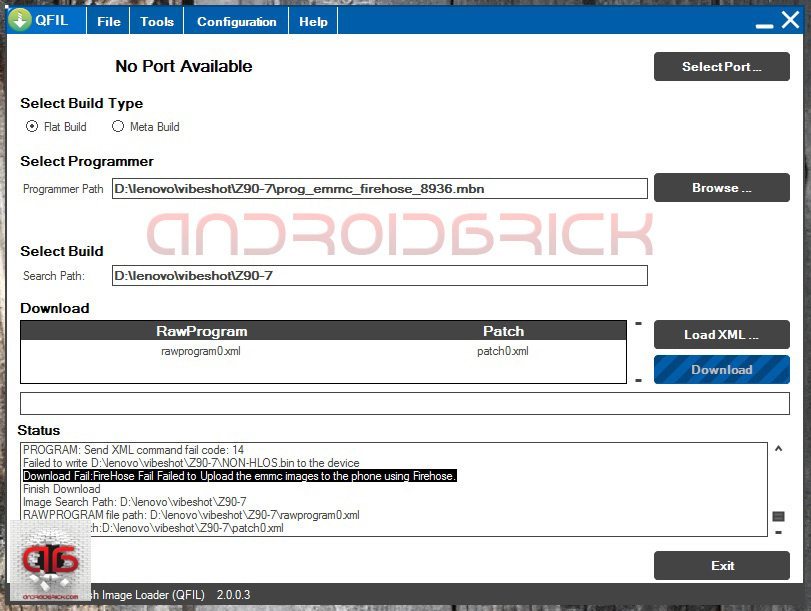
Qfil will recognize HS-USB Qdloader 9008 port and “Download” tab/option will be ready to click. Click it immediately if you opened the port with key combination because after 5 seconds phone will restart, if you click “Download” in time, the Qfil will hold the port and start flashing our ROM. If you opened the port with adb command, no need to hurry, port will stay open as long as you press power button long enough to reset.
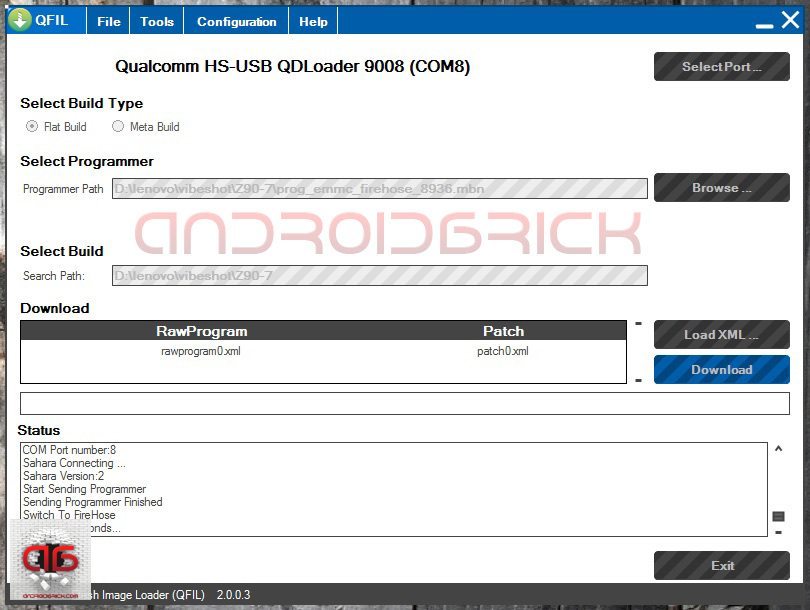
Look at the “Status” window. If you see “Switch To FireHose and Wait for 3 seconds..” lines then everything seems fine, Qfil will start to flash our Qualcomm Lenovo/ZUK’s. If you see “Download Fail” line at the end, please press power button long enough to reset the phone/port and try again.
Remember : Phone/port must be resetted after every attempt with Qfil.
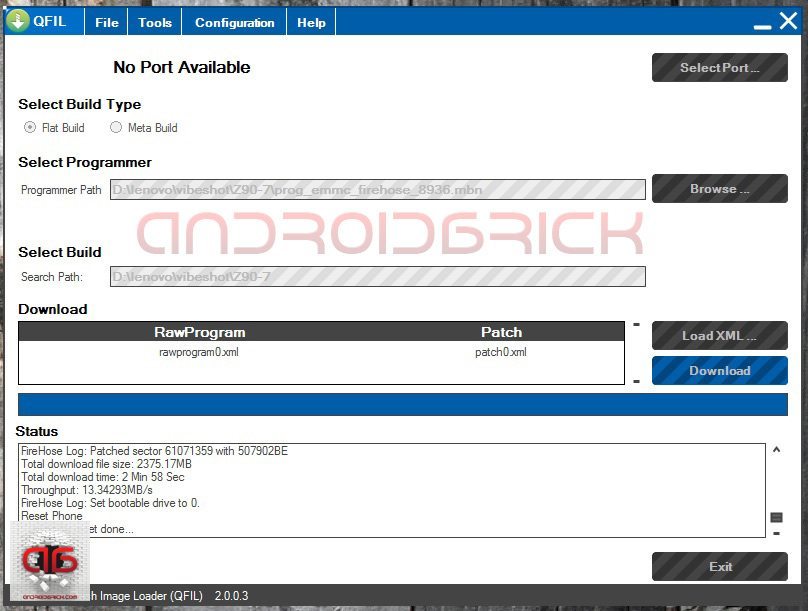
After Qfil finishes flashing, in our example it took 2 Min. and 58 Sec., the phone will be reset from the program itself. You can close Qfil after you see “Waiting for reset done…” ignoring any pop-up. Your phone is rescued/unbricked and will boot with your new ROM. Congratulations !
Congratulations !
qualcomm diag port driver
setup download

Comments
Post a Comment